Saturday, July 31, 2010

Fun CHA Photos!

me, Nana, Sarah and Kiki

The boss man would say that CHA is all about business (and, ok, it is....) BUT, for those of us working in the booth and making new friends, it's also about the long term friendships and bonding that this wonderful industry has provided us.  We do work hard, but at the end of the day and the end of the show, the memories and friendships live on....
Kiki Izurrategui from Kiki-Art was a dynamo in our booth this show.  We used her papers, fun tape and chipboard embellishments to create the Zutter make 'n takes. Here we are tearing down the booth on Thursday.  Tear-down takes minutes compared to setting up. :)
 We are lucky to have Zutter Zisters help out in the booth, and as at the Winter show in Anaheim, Sarah de Guzman was on hand for this one. Zister Pam Sandy was walking the floor, too, but WHY OH WHY did we never meet up???  Big sad face :(
And, here we all are again, only this time we corralled Mr. Zutter into some pictures.  He liked having all the silliness around the booth - as always (is there ever NOT any silliness???)

Thanks to everyone who stopped by to say hello.....we have some big plans and lots to do now that the show is packed up! Thanks for the most awesome-est memories.


Tuesday, July 27, 2010

CHA Summer Day 2 - Kiki Art Make 'n Take

We had a great first day at the CHA Summer show in Chicago!  Wednesday we will be doing this  make 'n take with some of the beautiful papers from Kiki-Art.  This is a 3-panel 3X4 Zutter Clipboard Wood wall hanging, using the Hang-it-Alls, and Rivets.
These two paper lines are called Jardin and Water/Rain collection.  Fun, yes?  We will be using a variety of papers tomorrow.  But you get an idea.....
More fun stuff to come :)

Monday, July 26, 2010

Kiki Art Minis - A Sneak of one of our Summer CHA Make 'n Takes

We are hitting the road and heading to Chi-Town for the Summer CHA Show this week.  We are super excited to have Kiki Art in the Zutter booth with us, showing off their papers for the Zutter make 'n takes.  One of the projects we will make are these 3X4 Clipboard Wood mini books.  Not sure which of Kiki's newest papers we will use, but these lines are super bright and colorful!  Many of Kiki's yummy papers are glittered, or flocked, or embossed, or just plain delish!

See you at the show - be sure to stop by and say HI!

Friday, July 23, 2010

Take a Class with a Zutter Zister

Good day, all you Zutter fans! :) Sarah, here... and today, I wanted to share one of my upcoming classes with you.

If you are in the Northern California area, I will be at Art Inspired Studios teaching a fun class that will show you how to use the Bind-it-All. On top of learning how to use this awesome binding tool, we will be playing with some other Zutter products.


If you've always wanted to try binding your own book with the Bind-it-All and work with awesome Zutter products, you won't want to miss out on this class. So if you are in the area, check it out.

Also, if you have any questions regarding how to bind with your BIA, this will be an opportunity to ask all of those questions.

When: August 7, 2010 at 2 pm - 4 pm
Where: Art Inspired Studios, Brentwood, CA 
(not the Los Angeles area Brentwood, but the NoCal Brentwood between SF and Stockton)
3860 Balfour Road Suite F
925-684-7056
Cost: $25

Hope to see some of you there!

Hugs,
sarah.

More Shabby Yumminess at Summer CHA (Booth #1912)

If you like the Zutter 13X13 Corrugated Board released at Winter CHA, you will be happy to see that Zutter - along with "Artsy Fartsy" Donna Salazar - is releasing more of the same in other, convenient sizes.  It's super light, durable and you can distrezz it like crazy with the Distrezz-it-All.

Go shabby chic with these goodies :) 
The 13X13 is available now here with the other sizes coming soon.

See you in Booth #1912 in Chicago next week!

Wednesday, July 21, 2010

Grunge-o-licious Binding!

Grunge Paper plus the Bind-it-All equals a grunge-o-licious mini just for the filling!!!

Supplies Needed to create this PRETTY:

Bind-It-All
O-Wire
Grunge Paper
Re-inker Mixture (Mini Mister, Reinker Ink, Perfect Pearls and water)
Liquid Pearls
Distress Ink
Stamps
Paper Leaves and Ribbon
Tim Holtz - On the Edge Dies

I cut my pages to their desired sizes and accented the edges with the On the Edge Sizzix Dies.


I stamped on the pages, spritzed the pages and sewed on the pages.

My next step was to bind the edges with my trusty Bind-it-All.

Now to create the Grunge Paper embellies. The center red flower was created by cutting out (2) circles, creating petals by cutting in toward the center and accenting the edges with Liquid Pearls. When the the LP's are dry....spritz away with the Reinker Mixture.

The yellow swirl flower....I cut a circle, stamped on the circle, spritzed with Reinker Mixture. When dry, I cut the circle into a spiral, twisted it, and adhered it to the base. There you have it...

To create the Grunge Paper Rose....check out my tutorial.

Oops...I forgot the ribbon....seam binding spritzed with my Reinker Mixture....that was squinched and dried.

And there you have it....a grunge-o-licious beauty!!!

Monday, July 19, 2010

Coverall + old map + Modge Podge = Vacation Album!

I simply love Zutter's Cover-Alls. They are so versatile, they come in several different styles and types, and they make great album covers. They can be covered in paper, fabric, they can inked, stamped, drawn on, and in this project covered with an old map. I wanted to make an album for our trip out East last Summer and decided to use a map of the part of the country we traveled as the covering for the Cover-All. I simply cut out the piece I wanted, applied Modge Podge to back and front of paper and Cover-All and covered outside cover.
I also used the fabulous rivets and rivet set tool to apply these metal pieces cut from license plates to spell "2009".
To cover the inside covers I cut a piece of chipboard just a bit smaller than the page and covered it with paper and then applied that covered piece of chipboard to the inside covers. A single strip of paper down the middle of the inside of the spine of the album and you are done!

The possibilities are endless when it comes to Zutter's Cover-Alls! I could see using old papers, magazines, photos, book pages, you see what I mean!!! Happy creating with Zutter!!

Zutter Zisters DT Shelley Haganman

Thursday, July 15, 2010

Christmas in July

Time to get ready for Summer CHA in Chicago! It's in just a couple weeks, and that means MAKE SAMPLES!!

Here is one of the books I made this week using some of the new paper from Donna Salazar.  These ones are Christmas Rose & Ribbon and Holiday Greetings.  These papers are formatted for and are a breeze to cut in the Dreamkuts....check them out on her blog.
This little holiday book was made with 8X8 Zutter Clipboard Wood, weathered with various colors of Smooch Spritz.  Also Smooched and wrinkled the papers to get a fabric-like look....it's all paper (except for the denim under the title and the red flowers).  I even stamped/embossed....I know, even shocked myself.  I almost never stamp.  Donna's stamps are pretty groovy though and hard to resist.

Don't forget, the Clipboard Wood makes for a durable, long lasting base to your books (or for decor projects - check this out on my blog).  It's punchable with the Bind-it-All and is alterable just like chipboard. 

Have a great day!

Tuesday, July 13, 2010

Want to take just a few pieces of patterned paper......?

......some white cardstock, covers, and end up with four 6 x 6 albums?

I recently received some beautiful Lily Bee Design partterned papers from the Lovely Collection and fell in love with it. I wanted to stretch it into four different mini albums. Do you have some double sided patterned paper that you have been hoarding or admiring that you would like to stretch into several mini books?


Well, here is how you can do it! First, grab four 6 x 6 Cover-Alls (or you could use 6 x 6 Acrylic or Clipboard Covers or 
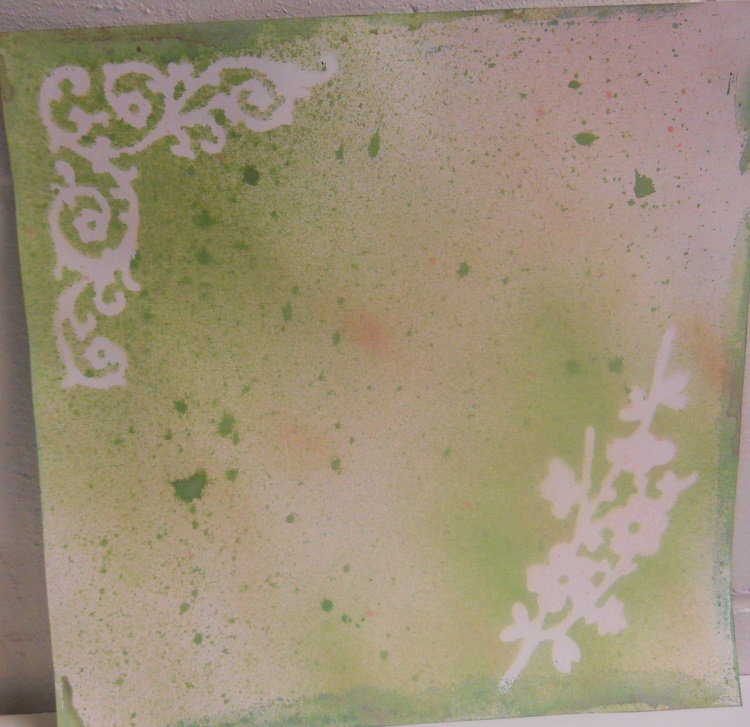
Chipboard Covers instead), then cut all your pattened paper pieces into 6 x 6 sections. I had 6 pieces of patterned paper to begin, so I ended up with 24 pieces after I did this. Next, pick some coordinating mist spray and spray some white cardstock (I did about 8 - 10 sheets of white CS). I used a few pieces of chipboard and some die cut flowers for masks. Just lay them on your cardstock and spray away. I used several colors together and made different combos too (spray both sides). I added Stickles for a bit more glimmer. Here are a few examples ~


After your sprayed cardstock is dry (I am impatient, so I used my heat gun to speed up the process), cut it into 6 x 6 pieces. Next ink all edges of your patterned paper and your sprayed CS with ink. Keep one each of the different patterned paper and several different sprayed CS 6 x 6 pieces and set aside. I took decorative edge scissors (feel free to use border punches too) and cut strips of each piece, varying th ewidth of each piece. I then took my Diztresser and used it to lightly diztress all edges of the 6 x 6 pieces of paper. You should have piles of pages that look like this ~


Next you can start layering the decorative edged strips you cut onto your pages, and stitch, stamp, use rub ons, felt, tags, or add bling accents on your pages. Don't forget to use your Bind-It-All to punch the binding slots on one side of each page when you are happy with it. I also like to use my BIA to punch a few decorative holes on an additional side of a few pages, then thread a bit of sparkly gold tulle through the slots. It adds a bit of glitter and hint of color really quickly and easily, for little cost. Finally, bind your book together, and embellish your covers. I used things out of my stash to complement the beautiful Lily Bee items I was working with. I love mixing different products from my stash with favorite products. Don't forget to use your Zutter Heavy Duty Round-It-All to add interest to your project! It easily cuts through chipboard and quite a few layers of paper.

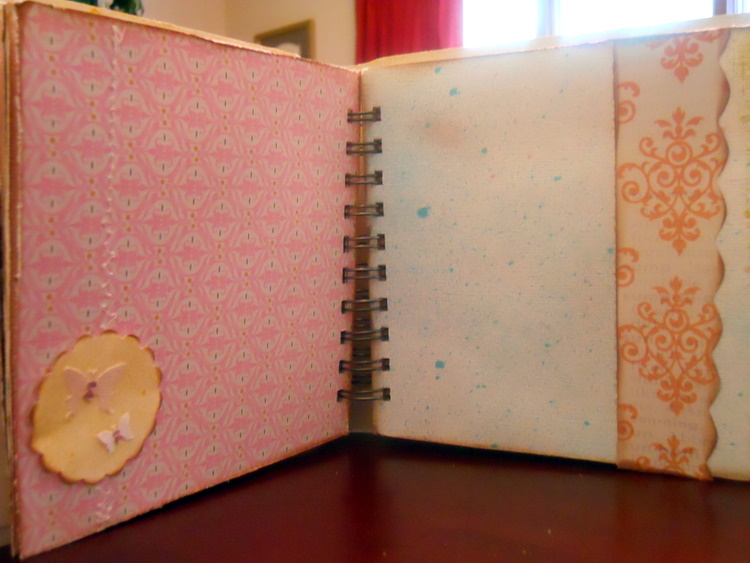
Here are some pictures of inside pages to give you some ideas for your own project (notice the Diztressed edges, LOVE playing with my Distrezzer!!!) ~


So go ahead and cut up that favorite Patterned Paper! You can easily create 4 projects that will bring happiness to others as well as yourself. Happy creating! ~ Pam

Zutter Zister DT Member Pam Sandy